
How to Hatch and Incubate Iguana Eggs: Step-by-Step Guide for Successful Breeding
Iguanas are among the most popular reptiles bred by reptile enthusiasts. Successful breeding begins with proper handling of the eggs and optimal incubation. In this article, you’ll learn everything you need to know about collecting, incubating, and hatching iguana eggs, including the requirements for temperature, humidity, and care of the hatchlings.
1. Basics of Iguana Breeding
Before you start incubating iguana eggs, it is important to understand the basics:
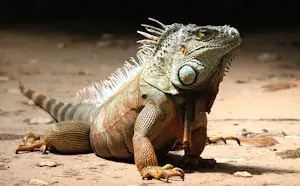
Suitable Breeding Pairs: Only healthy, adult iguanas should be used for breeding. Both males and females need to be housed in an appropriate manner.
Mating: Mating season varies depending on the species. During this time, the female should be well-fed and provided with calcium supplements to ensure good egg production.
Egg Laying: Female iguanas lay their eggs in prepared substrate. The eggs must be handled carefully after laying to ensure proper embryonic development.
2. Preparing the Egg Laying Site
Setting Up the Laying Box
A suitable laying box is crucial for success:
Substrate: Moist, diggable materials like sand, soil, or vermiculite are ideal.
Size: The box should be large enough for the female to comfortably dig and lay the eggs.
Humidity and Temperature: Keep the substrate slightly moist to prevent the eggs from drying out. The temperature should be around 28–30°C (82–86°F).
Observing the Egg Laying Process
Once the female is ready, she will start digging and lay her eggs in a depression. After the laying process, the eggs should be gently removed.
3. Collecting the Iguana Eggs
Once the egg-laying is complete, the eggs need to be quickly transferred to the incubator:
Handling with Care: Carefully lift the eggs without turning them. The top of the eggs should remain in its original position, as turning them may harm the embryos.
Marking the Eggs: Mark the top of the eggs with a soft pencil to avoid confusion.
Transporting the Eggs: Transfer the eggs quickly but gently into the prepared incubator.
4. Preparing the Incubator
A well-equipped incubator is crucial for successful incubation.
Choosing the Right Incubator
Commercial Models: These offer precise temperature and humidity control.
DIY Incubators: Styrofoam boxes with heating cables and thermostats are also effective.
Temperature and Humidity
Temperature: The optimal temperature for iguana eggs is between 29–31°C (84–88°F).
Humidity: A relative humidity of 80–90% is ideal. Too dry conditions can cause the eggs to dry out, while excessive moisture can promote mold growth.
Control Devices: Use a thermometer and hygrometer to regularly monitor the conditions.
Substrate for the Eggs
Vermiculite or perlite are reliable substrates for incubation.
Mix the substrate in a 1:1 ratio with water (by weight) to ensure consistent moisture.
5. Incubation Time and Care
The incubation period for iguana eggs varies depending on the species and environmental conditions, ranging from 60 to 120 days.
Monitoring During Incubation
Regular Checks: Check the temperature and humidity at least once a day.
Air Circulation: Ensure adequate ventilation to prevent mold growth. Occasionally open the incubator to allow fresh air in.
Removing Unfertilized Eggs: Unfertilized eggs should be removed to prevent mold growth.
Signs of Hatching
Towards the end of the incubation period, the eggs will become softer, and the hatchlings will begin to break the shell with their egg tooth.
Be patient and wait until the hatchlings emerge on their own. Intervention is usually unnecessary.
6. Caring for Newly Hatched Hatchlings
After hatching, the hatchlings require special attention to ensure a healthy start in life.
Raising Conditions
Terrariums: Keep the hatchlings in small groups or individually in terrariums with moist substrate initially.
Temperature: Maintain a stable ambient temperature of 28–32°C (82–89°F) with a warm spot under a lamp.
Humidity: Keep the humidity around 70–80% to aid in shedding.
Hiding Spots: Provide hides and climbing opportunities to reduce stress.
Nutrition
The hatchlings will start eating about 1–2 days after hatching.
Feed them smaller insects like fruit flies, mini crickets, or mealworm larvae.
Supplement their diet with calcium and vitamin supplements to promote healthy growth.
7. Common Problems and Solutions
Mold Formation
Problem: Too moist substrate or insufficient ventilation.
Solution: Slightly reduce moisture and ensure better air circulation.
Embryo Death
Problem: Temperature fluctuations or insufficient humidity.
Solution: Use reliable control devices and maintain constant conditions.
Eggs Not Hatching
Problem: Poor fertilization or developmental issues.
Solution: Check conditions and dispose of unfertilized or dead eggs.
8. Tips for Successful Breeding
- Research extensively on the specific requirements of your iguana species.
- Invest in high-quality equipment to create optimal incubation conditions.
- Be patient and pay attention to details – even small fluctuations can impact success.
Conclusion
Hatching and incubating iguana eggs is a fascinating task that requires knowledge and care. With the right preparation, careful monitoring of incubation conditions, and proper care of the hatchlings, you can successfully breed healthy iguanas.