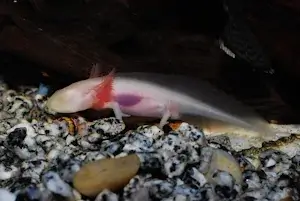
Hatching and Incubating Axolotl Eggs: A Comprehensive Guide to Successful Breeding
Axolotls (Ambystoma mexicanum) fascinate reptile and amphibian enthusiasts worldwide with their unique appearance and remarkable ability to regenerate. Breeding these extraordinary creatures begins with successfully incubating their eggs. In this article, you will learn everything about hatching and incubating Axolotl eggs—from egg laying to larval care.
1. Basics of Axolotl Breeding
Mating and Egg Laying
Sexual Maturity: Axolotls usually reach sexual maturity between 12 to 18 months of age.
Reproduction: The male deposits spermatophores, which the female takes in. A few days later, the female lays up to 1000 eggs on aquatic plants or other structures in the aquarium.
Egg Laying Environment: An aquarium with hiding places and plants provides ideal conditions.
Identifying Fertilized Eggs
Fertilized eggs are recognizable by a dark spot in the center, which develops into an embryo within a few days. Unfertilized eggs typically remain milky white.
2. Preparing for Incubation
Collecting the Eggs
Careful Collection: Gently remove the eggs from the aquarium without damaging them. A tweezer or careful hand removal can be helpful.
Separate Incubation Tank: Transfer the eggs to a separate tank to increase survival chances.
Setting Up the Incubation Tank
- Water Quality: Use dechlorinated water or special aquarium water with a neutral pH (6.5–7.5).
- Temperature: Keep the water temperature consistently between 18–20°C.
- Filtration: Use a gentle sponge filter to keep the water clean without disturbing the delicate eggs.
3. Incubation Time and Egg Care
Embryo Development
The incubation period lasts approximately 14–20 days, depending on the temperature.
Observation: Within a few days, the first signs of embryo development become visible. The eggs transform from a spherical shape into a recognizable Axolotl larva.
Regular Monitoring
- Water Changes: Perform partial water changes every 2–3 days to maintain water quality.
- Remove Dead Eggs: Remove unfertilized or dead eggs to prevent mold growth.
- Aeration: Ensure that the water is adequately oxygenated.
4. Hatching the Larvae
Signs of Hatching
Just before hatching, the larvae become active within their egg capsules.
The young larvae will break out of their egg capsules on their own.
Post-Hatching Measures
- Transfer the larvae to a separate rearing tank to protect them from potential hazards.
- Keep the water temperature and quality consistent to avoid stress and disease.
5. Caring for Hatched Axolotl Larvae
Setting Up the Rearing Tank
- Water Level: A low water level makes it easier for the larvae to feed.
- Temperature: A temperature range of 16°C to 18°C is ideal for juveniles.
- Hiding Places: Provide the larvae with hiding spots like plants or small tubes to reduce stress.
- Filtration: Continue using a gentle sponge filter to maintain water quality.
Tank Size: The rearing tank should be at least 80 cm long, as Axolotls enjoy swimming. For fully grown Axolotls, the tank should be 80–100 liters. Be prepared for the growth of the larvae.
6. Feeding the Larvae
First Feeding: The larvae start feeding about 24–48 hours after hatching.
Suitable Food:
- Microworms or Artemia nauplii are ideal for the first days.
- As they grow, Daphnia and finely chopped Tubifex worms can be fed.
Feeding Frequency: Feed the larvae 2–3 times daily in small amounts to avoid overfeeding and water contamination.
Growth and Development:
- After 2–4 weeks, the larvae will develop visible legs.
- Transfer the juveniles to larger tanks as they grow to avoid cannibalism.
- After 9–12 months, the juveniles will be fully grown.
7. Common Problems and Solutions
Mold Growth on Eggs
- Problem: Unfertilized eggs tend to mold and pose a risk to other eggs.
- Solution: Remove affected eggs immediately and use an antifungal treatment (only after consulting with an expert).
Poor Water Quality
- Problem: Poor water quality can hinder embryo development.
- Solution: Perform regular water changes and monitor water parameters.
Losses in Larvae
- Problem: Larvae often die due to poor diet or stress.
- Solution: Ensure optimal water conditions and adjust the food to the size of the larvae.
8. Tips for Successful Breeding
- Educate yourself about the specific needs of your Axolotl species.
- Plan the breeding carefully to ensure space for rearing the larvae.
- Monitor the eggs and larvae regularly and act quickly if problems arise.
- Ensure that the future owners of the juveniles are well-informed when you give them away.
9. Conclusion
Hatching and incubating Axolotl eggs is an exciting process that requires patience and care. With the right preparation, optimal conditions, and thoughtful care, you can successfully raise healthy juveniles and make an important contribution to the preservation of these fascinating creatures.

